

To see faxes in Solum, you need to forward them to our system first. Contact support@getsolum.com to set up fax forwarding for your practice.
Quick Start
- Go to AI Faxes in the left menu.
- Review fax summary counts at the top of the page.
- Use filters to find the faxes you need.
- Click on a fax to open the detail sidebar.
- Review the extracted data and correct anything if needed.
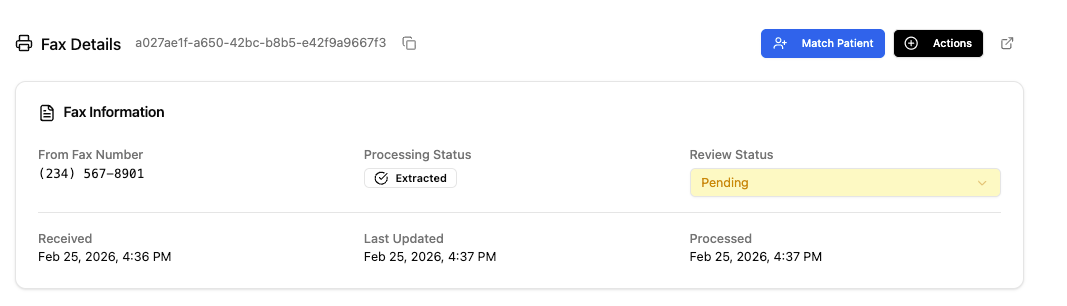
- Click Match Patient to link the fax to a new or existing patient.
- Choose whether to send an intake form, run verification of benefits or just create/update a patient.
Accessing AI Faxes
- Open the left navigation menu.
- Click AI Faxes.
- You will see the full fax list with a summary bar at the top showing four counts: All, Completed, Pending, and Action Required.
Understanding the Summary Bar
At the top of the page, you will see four summary cards:Filtering Your Faxes
Use the filter bar below the summary to narrow down the fax list. You can filter by:
Processing Status Explained
Understanding Review Statuses
Each fax has a Review Status that tells you what action is needed: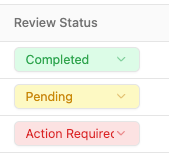
Caption: Review Status indicators show Pending (yellow), Completed (green), and Action Required (red)
Viewing a Fax
- Click anywhere on a fax row to open it.
- A sidebar will open showing:
- Fax information at the top (sender details, fax type, received date).
- The PDF of the original fax document.
- Extracted information below the PDF.
Extracted Data Sections
The AI extracts and organizes data into these sections:Matching a Fax to a Patient
This is the core workflow. You are taking the extracted fax data and either creating a new patient or updating an existing one.Step 1: Start the Match
-
From the fax detail sidebar, click the blue Match Patient button at the top, or scroll down and click Continue with Patient Matching. Both take you to the same screen.
Step 2: Review and Edit Extracted Data
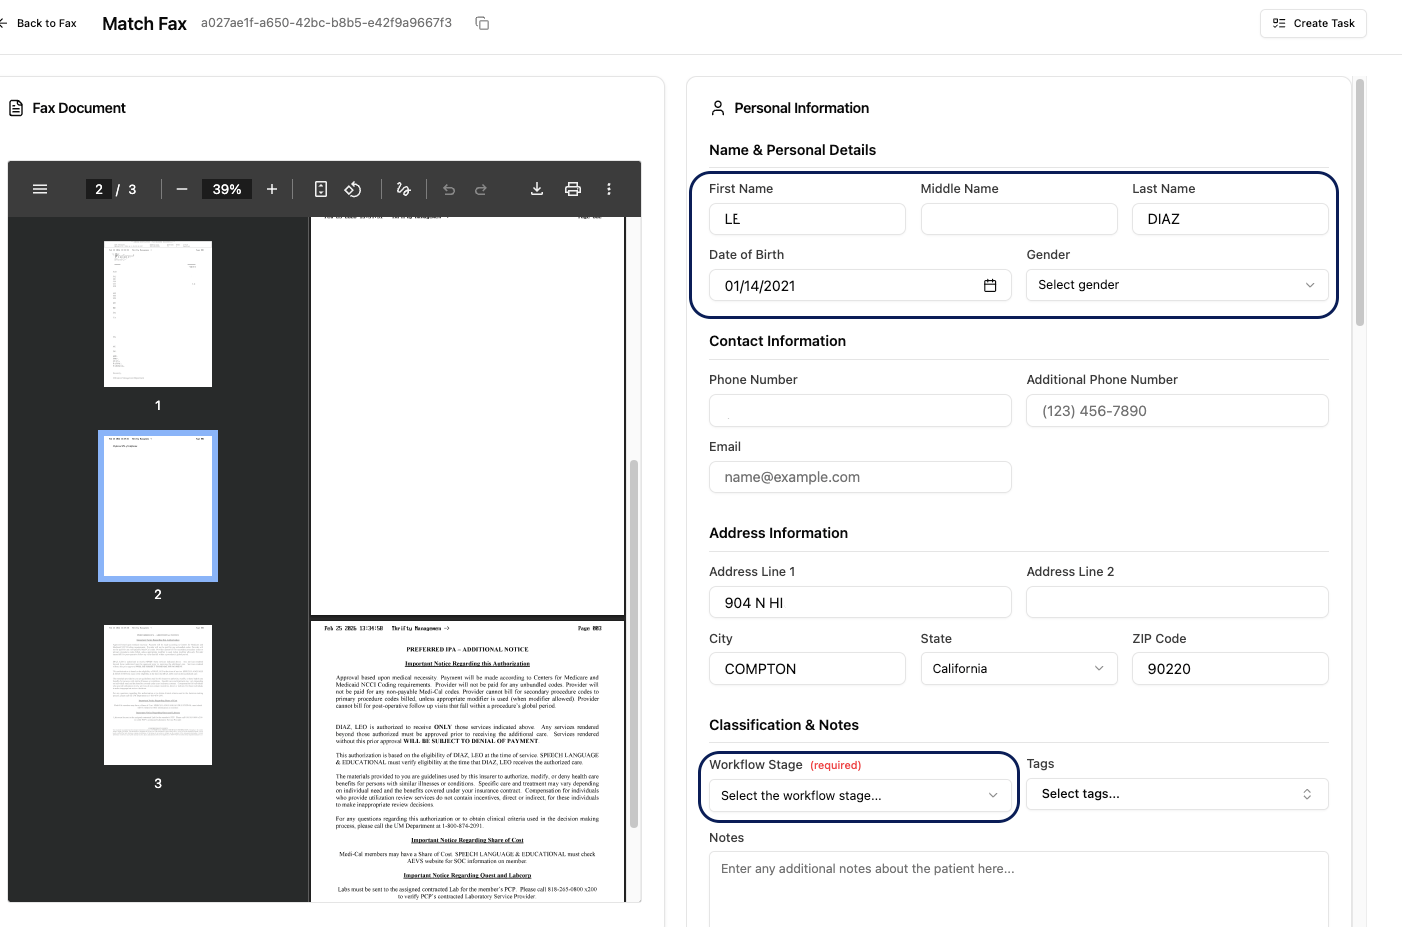
- On the left side of the screen, you will see the original fax PDF. You can download it from here.
- On the right side, you will see all the extracted data fields.
- Review each field and correct anything the AI may have gotten wrong.
Step 3: Select the Workflow Stage
-
Choose the Workflow Stage you want to place the patient in. This determines where the patient appears in your pipeline. It starts on the stage set for the fax’s document type in Settings → Fax Routing, or on your catch-all default stage.
Step 4: Handle Insurance Data
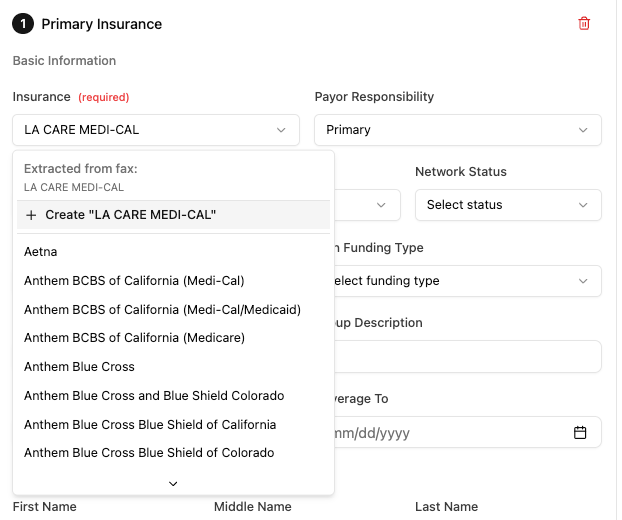
If the fax contains insurance information:- You can match it with an existing insurance from your settings.
-
Or you can create a new insurance directly from the fax matching screen.
Step 5: Match or Create the Patient
- Scroll down to the Match Patient section.
- You will see one of two options:
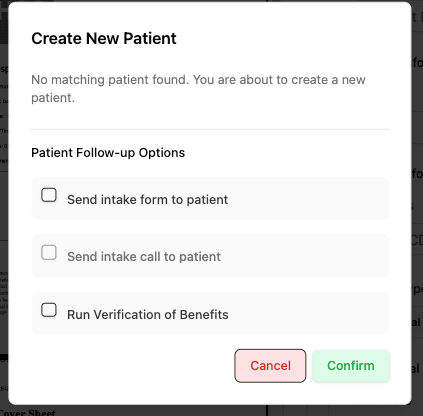
- New Patient: A pop-up will appear to create a new patient record with the extracted data.
-
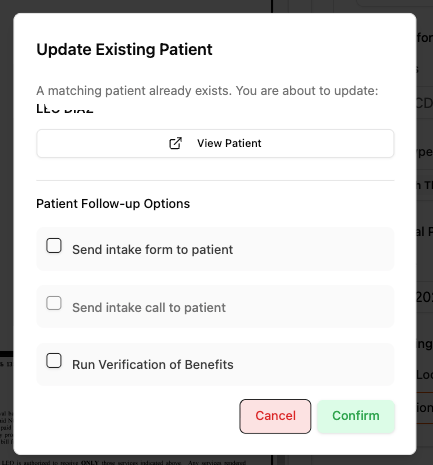
Existing Patient: If Solum finds a match, you can update the existing patient and the fax file will be uploaded to their profile.
Step 6: Optional Actions After Matching
After matching, you have two optional actions:- Send Intake Form: If you have an intake form set up, check the checkbox to trigger the intake sequence automatically.
- Request a VOB after matching: Check this to continue to a VOB request once the fax is matched. You review the insurance and services, then click Create VOB (the button reads Create N VOBs when several insurances are checked). It starts checked when the fax’s document type has Create VOB on in Settings → Fax Routing. Uncheck it to match without a VOB.
Using the Actions Menu
Each fax row has a three-dot menu (…) in the Action column. Click it to access these options: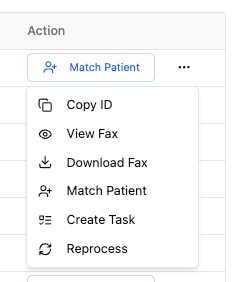
Creating a Task from a Fax
If you need someone on your team to review or follow up on a fax:- Click the three-dot menu (…) on the fax row.
- Select Create Task.
- Fill in the required fields:
- Title: A short description of what needs to be done.
- Description: Details about the task or fax.
- Assigned To: Select the team member who should handle it.
- Status: Defaults to Pending.
- Priority: Set to Medium by default. Change as needed.
- Deadline: Select a due date from the calendar.
- Click Create Task.
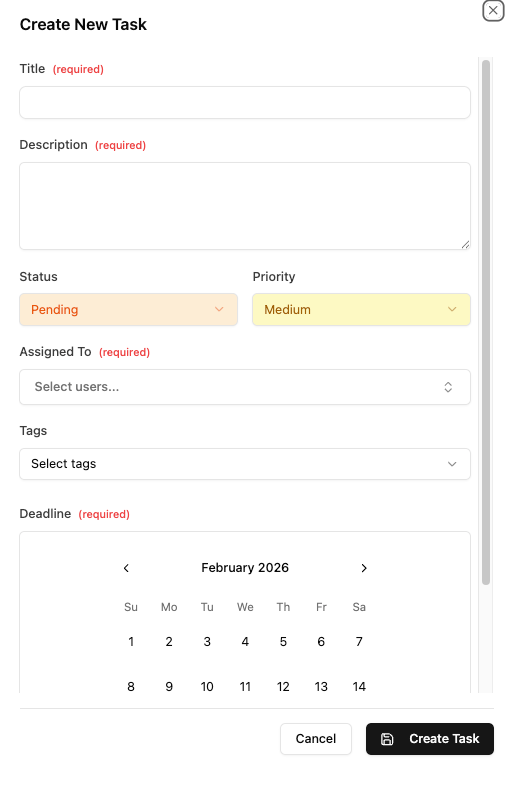
Caption: The Create Task form lets you assign fax follow-ups to specific team members with a deadline